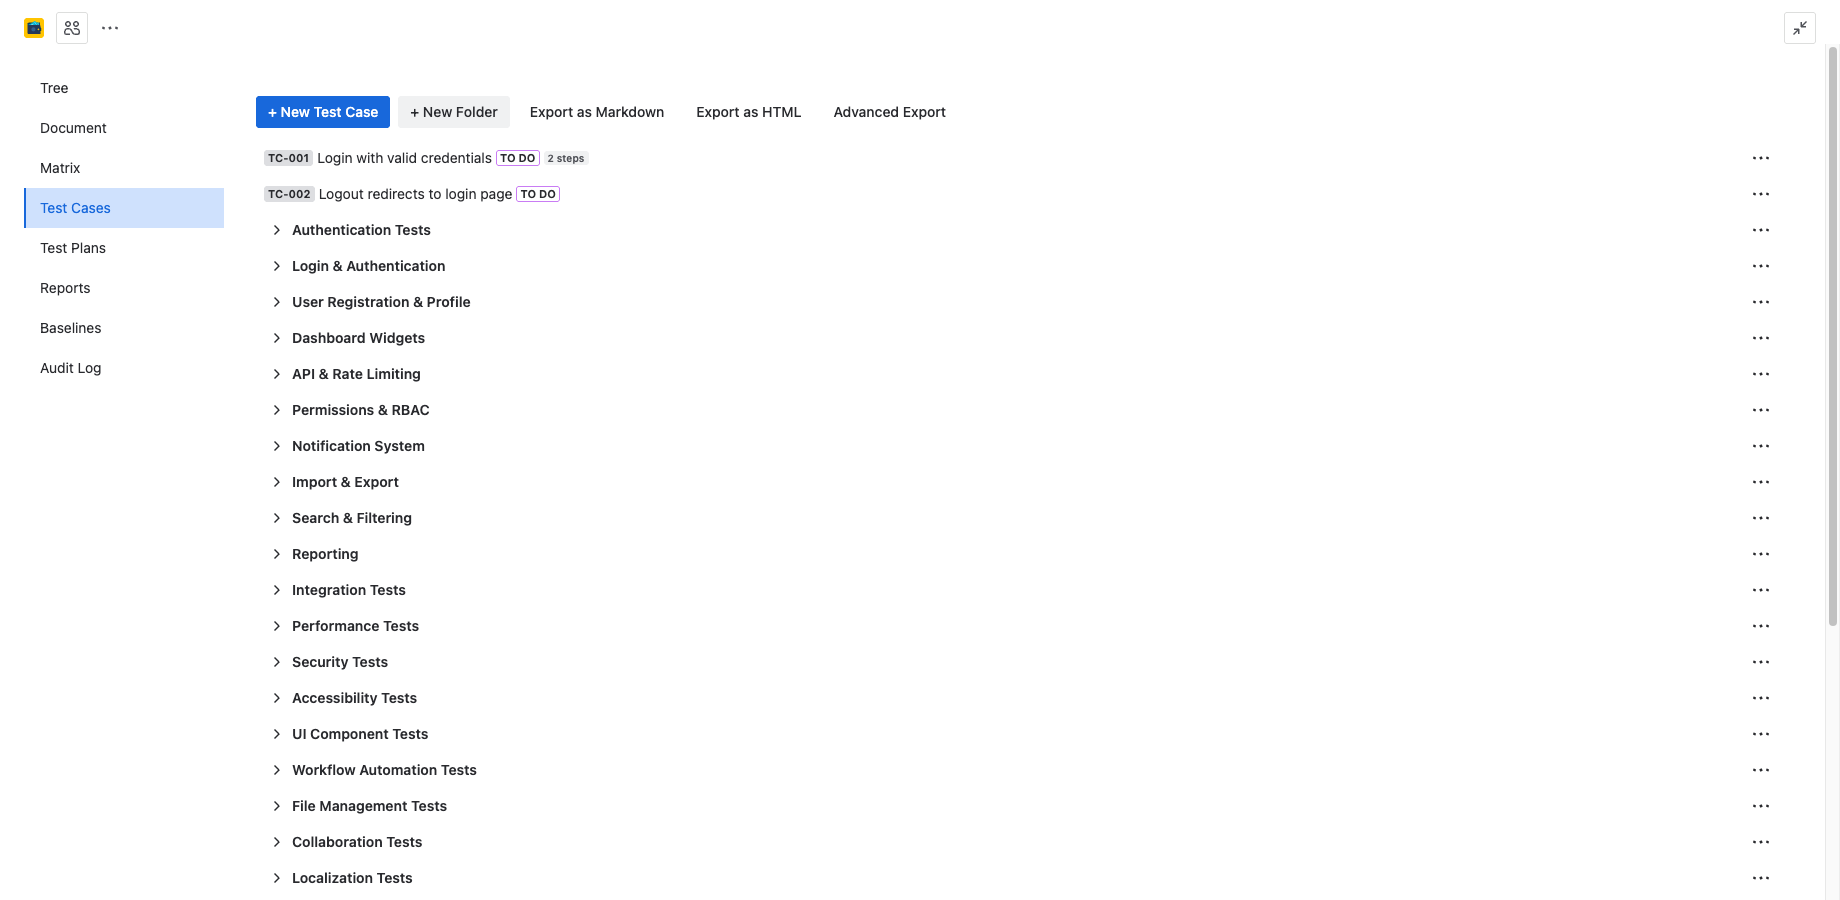
Test Cases
Creating a test case
To create a new test case, navigate to the Test Cases tab in your project and click the + button. Fill in the required fields and click Create. The test case is created as a Jira issue of type "Test Case" in your project.
- Open 4Spec from your project sidebar.
- Switch to the Test Cases tab.
- Click the + button in the toolbar.
- Enter a summary and optional description.
- Select a parent folder (or leave at root).
- Click Create.
Test case fields
Each test case includes the following fields:
| Field | Description |
|---|---|
| Summary | A short title describing what the test case verifies. |
| Description | Detailed context, preconditions, or notes for the tester. |
| Status | The Jira issue status (e.g., Draft, Ready, Approved). |
| Linked Requirements | Requirements this test case verifies, linked via Jira issue links. |
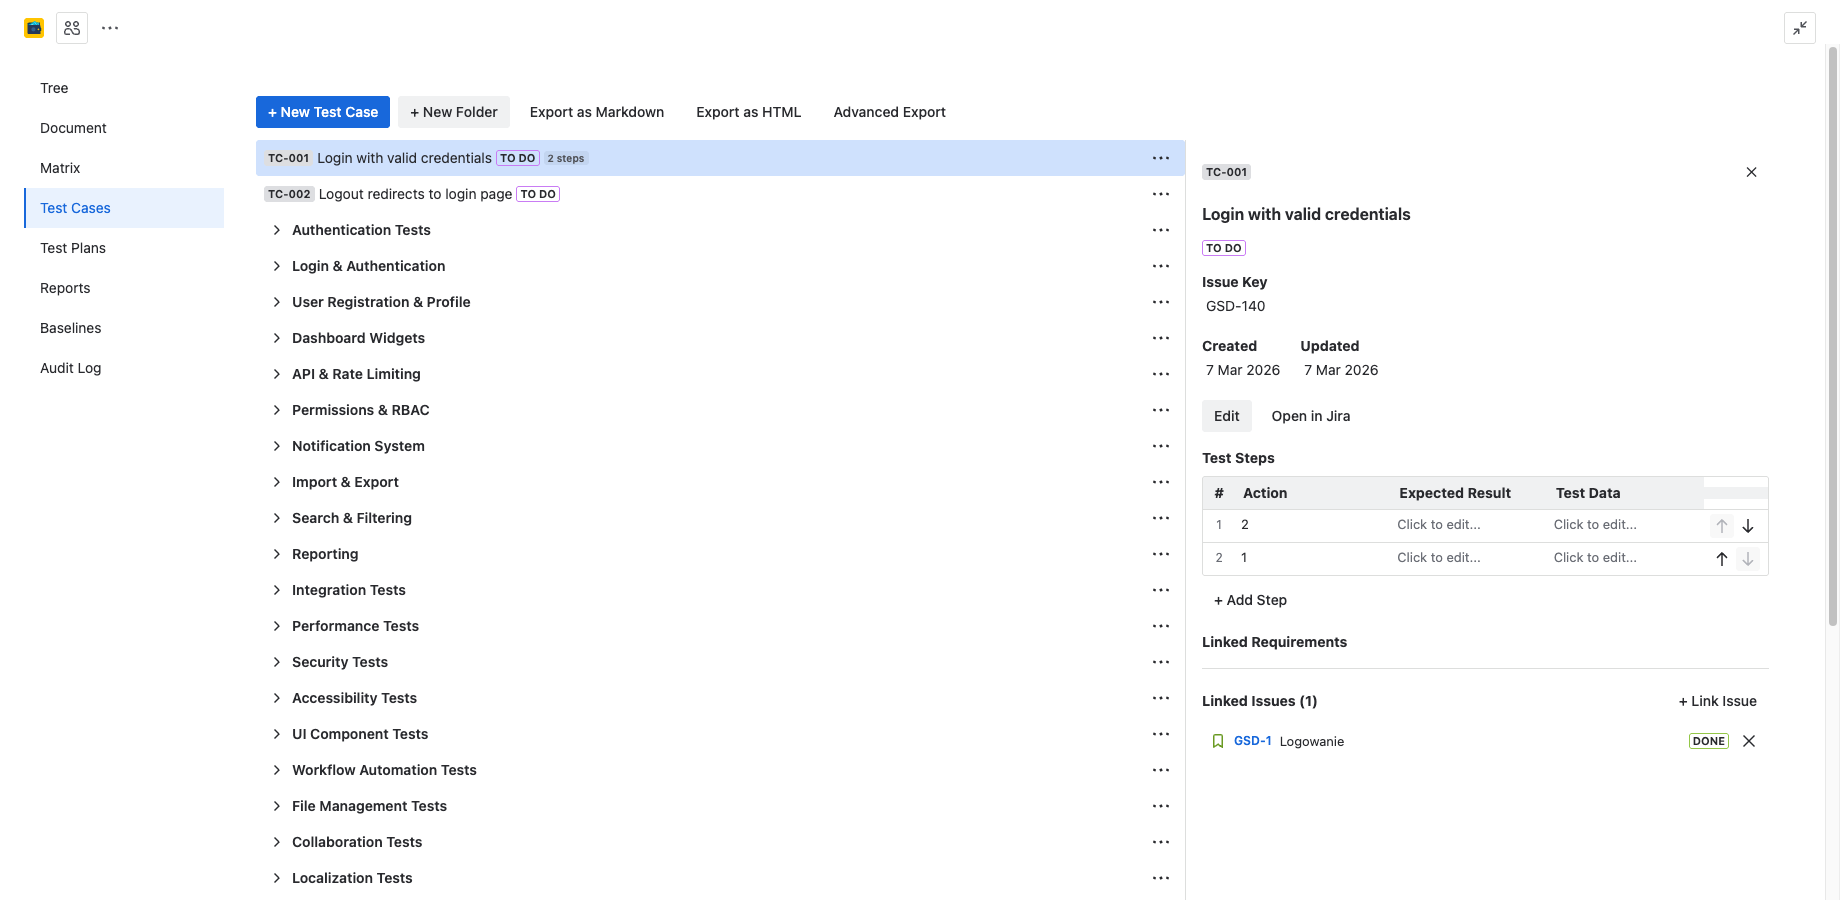
| Test Case ID | Auto-generated identifier in TC-001 format. |
Auto-generated TC IDs
Every test case receives an auto-generated identifier in TC-001 format. IDs are sequential per project and are assigned at creation time. The ID is stored in a custom Jira field called Test Case ID and is visible in the tree, detail panel, and reports.
TC IDs are immutable once assigned. If a test case is deleted, its ID is not reused.
Test case folders and tree
Test cases are organized in a folder tree, similar to the requirements tree. You can create folders to group test cases by feature, module, or test type. Drag and drop test cases between folders to reorganize them.
- Right-click a folder to rename, delete, or create a subfolder.
- Drag test cases between folders to move them.
- The tree supports unlimited nesting depth.
Steps editor
Each test case contains a sequence of test steps. The steps editor is a table where you define what the tester should do and what they should expect:
| Column | Description |
|---|---|
| Step # | Auto-numbered sequence (1, 2, 3...). |
| Action | What the tester should do. |
| Expected Result | What the correct outcome looks like. |
| Test Data | Input values, preconditions, or data the tester needs. |
Adding, editing, and deleting steps
Use the steps editor to manage test steps:
- Add a step: Click the + Add Step button below the last row. A new row is appended.
- Edit a step: Click any cell in the row to edit it inline.
- Delete a step: Click the trash icon on the right side of the row. Steps are renumbered automatically.
- Reorder steps: Drag the handle on the left side of a row to move it up or down.
All step changes are saved automatically when you click outside the editor or navigate away.

Linking test cases to requirements
Test cases can be linked to requirements to establish traceability. Links are bidirectional — linking a test case to a requirement also shows the test case on the requirement's detail panel.
- Open the test case detail panel.
- In the Linked Requirements section, click Link Requirement.
- Search for the requirement by summary or ID.
- Select the requirement and confirm.
Both the "Tests" and "Requires" link types are recognized by 4Spec for coverage calculations. You can also link from the requirement side — open a requirement and link a test case to it.
Searching test cases
Use the search bar at the top of the Test Cases tab to filter by summary text. The search filters the tree in real time, showing only matching test cases and their parent folders.
For advanced filtering, use Jira's built-in JQL search with the Test Case ID custom field.