Admin & Settings
4Spec provides two levels of configuration: global admin settings that apply across all projects, and project-level settings that can override or extend the defaults. Both are accessible to users with the appropriate Jira permissions.
Global Admin Settings
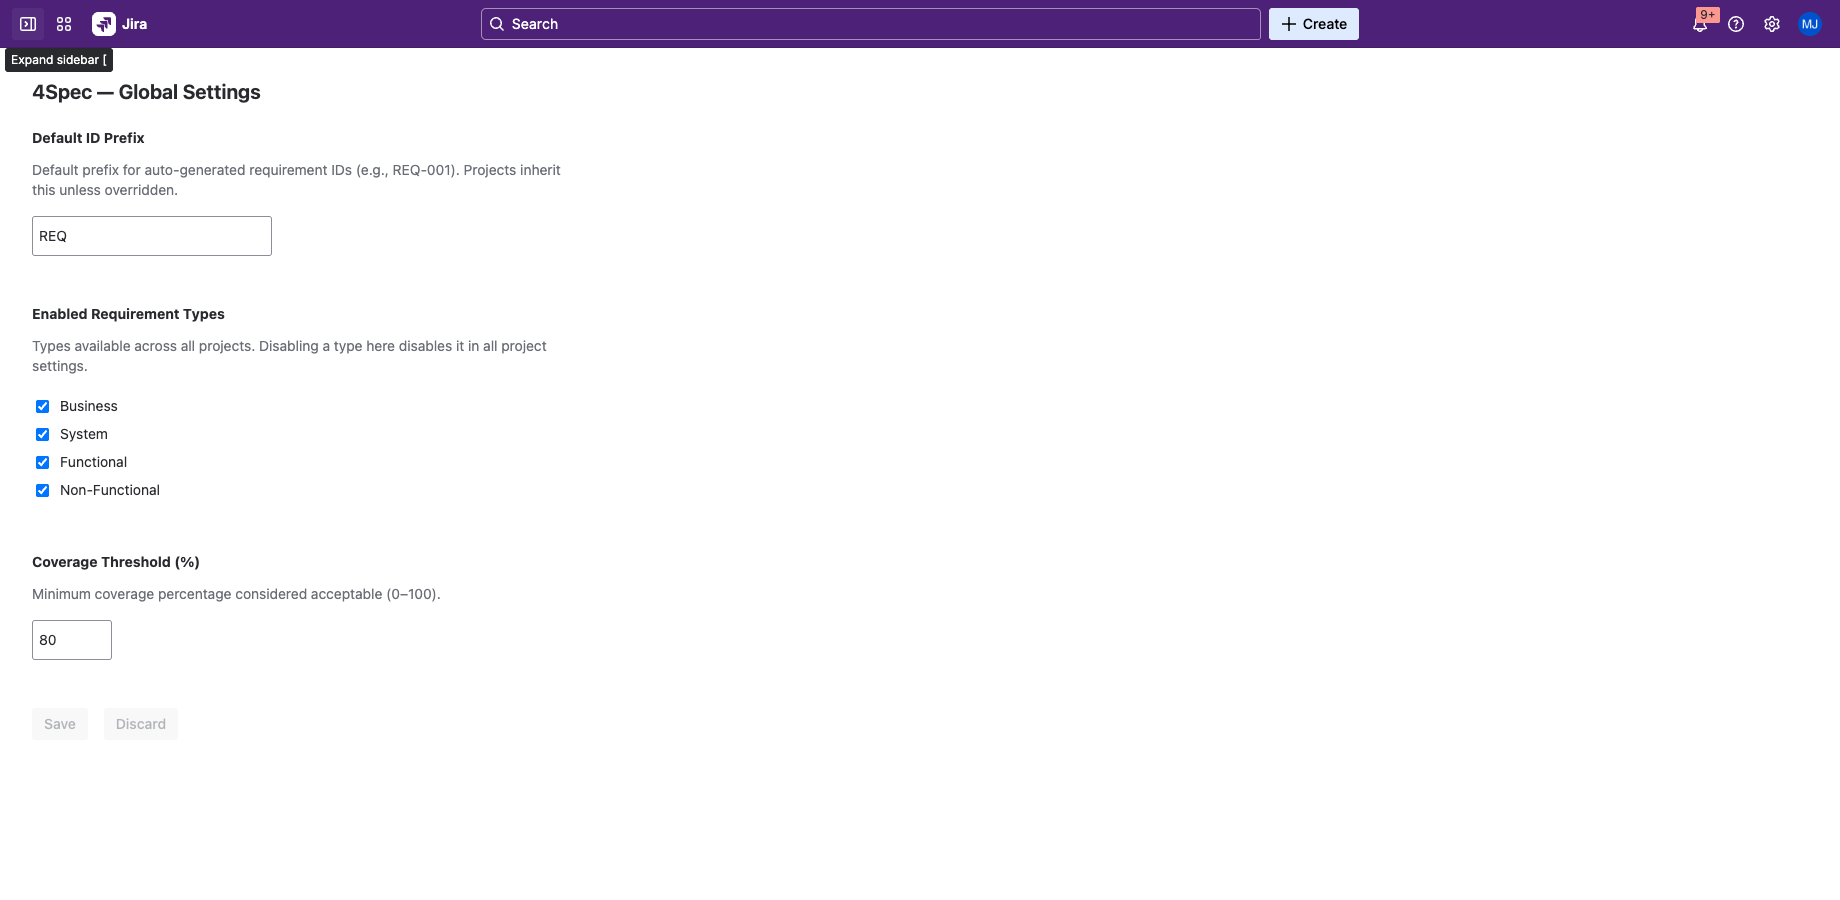
Global settings are managed from Jira Administration → Apps → 4Spec. Only Jira site administrators can access this page. These settings define the defaults for all projects.
Default ID Prefix
Set the default prefix used when generating requirement IDs (e.g., REQ produces REQ-001, REQ-002, etc.). Individual projects can override this prefix in their project settings.
Enabled Requirement Types
Choose which requirement types are available across the site. The built-in types are:
- Business — high-level business needs and objectives
- System — system-level capabilities and constraints
- Functional — specific behaviors and functions the system must perform
- Non-Functional — performance, security, usability, and other quality attributes
Disabling a type globally removes it from the type dropdown in all projects. Existing requirements of that type are not affected.
Coverage Threshold
Set the minimum coverage percentage that is considered acceptable. This threshold is used in the traceability matrix and reports to highlight under-covered requirements. The default is 100% (all requirements must be linked to at least one implementation issue).
Project Settings
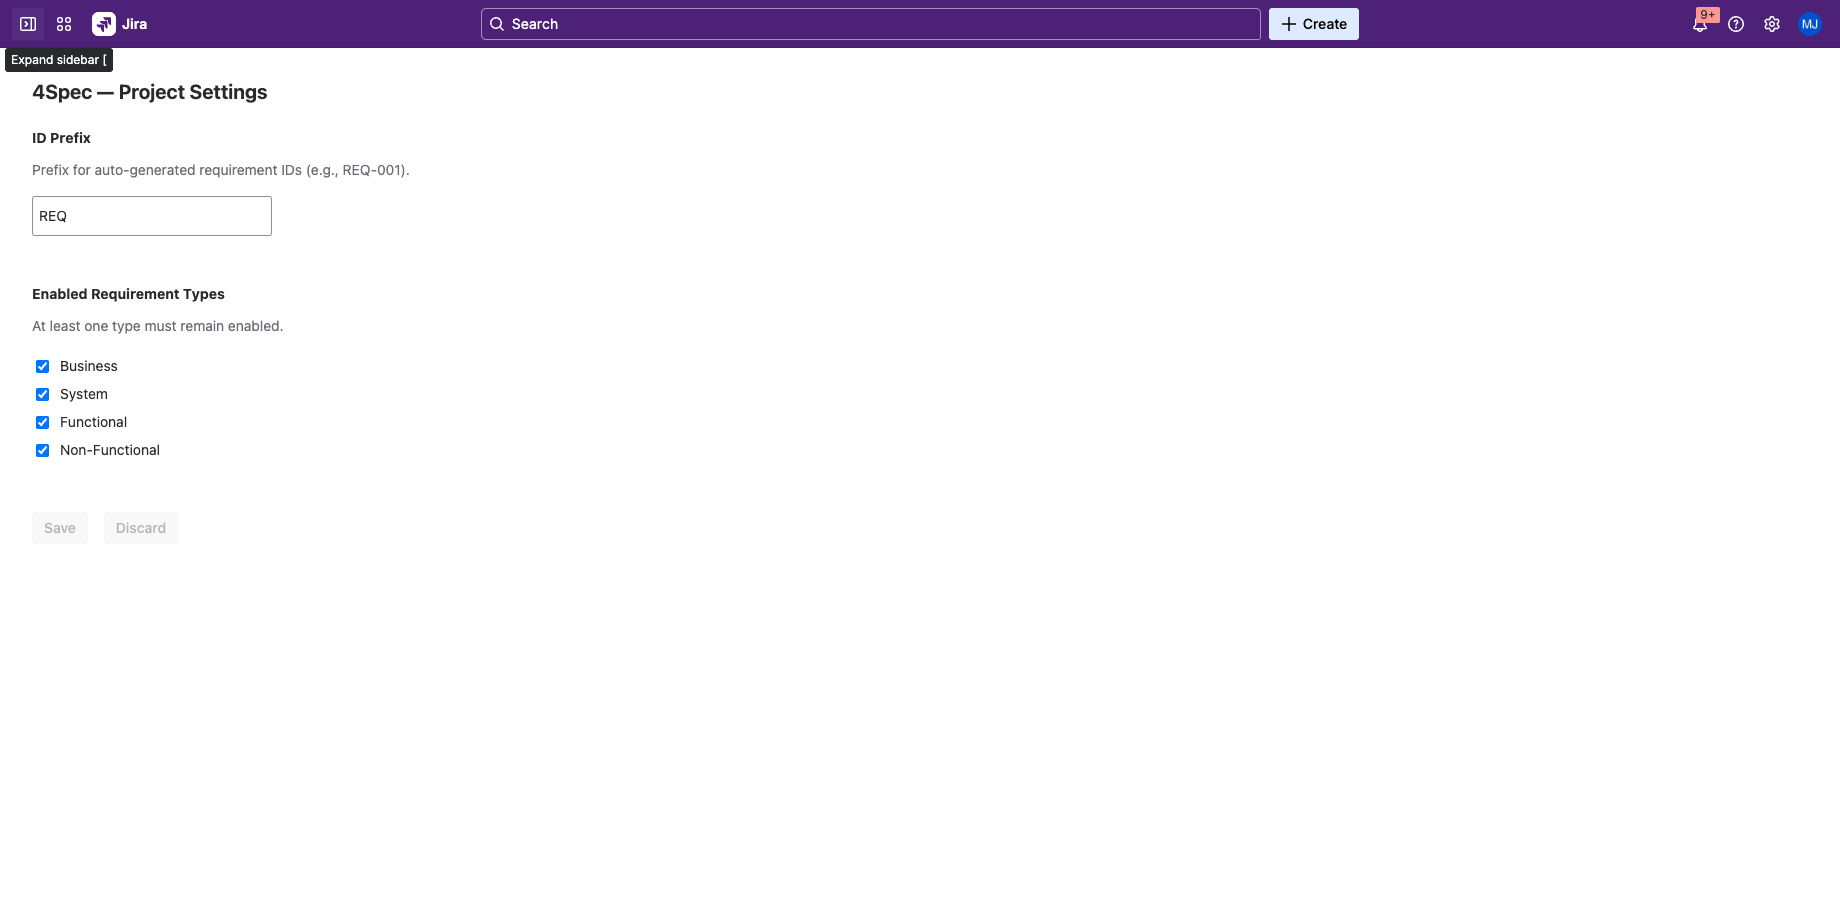
Project settings are managed from the project sidebar: Project Settings → Apps → 4Spec. Project administrators can access this page. Project settings override or extend the global defaults for a specific project.
Per-Project ID Prefix
Override the global ID prefix for this project. For example, a medical device project might use SRS (Software Requirements Specification) while a general project uses the default REQ.
Per-Project Types and Threshold
Enable or disable specific requirement types for this project, and set a project-specific coverage threshold. These settings override the global defaults.
Approval Workflow Toggle
Enable or disable the approval workflow for this project. When disabled, requirements do not have approval states — they can be freely edited at any time. When enabled, requirements follow the Draft → In Review → Approved lifecycle described in Approvals & Signatures.
Revert to Draft on Edit
When enabled, any edit to an Approved requirement automatically reverts it to Draft and clears all signatures. This ensures approved content cannot be silently modified. When disabled, approved requirements remain locked and must be manually moved back to Draft before editing.
Jira Permissions
4Spec respects Jira's built-in permission scheme. The following Jira permissions are required for specific 4Spec features:
| Jira Permission | Required For |
|---|---|
| Browse Projects | Viewing 4Spec project page, reading requirements and test cases, viewing reports and audit log. |
| Create Issues | Creating requirements and test cases (both are Jira issues under the hood). |
| Edit Issues | Editing requirement and test case fields, updating test steps, modifying folder structure. |
| Delete Issues | Deleting requirements, test cases, and test plans. |
| Link Issues | Linking requirements to implementation issues, linking test cases to requirements. |
| Manage Project | Accessing project settings, configuring ID prefix, enabling/disabling approval workflow. |
| Administer Jira | Accessing global admin settings, configuring site-wide defaults. |
If a user lacks a required permission, the corresponding UI elements are hidden or disabled. 4Spec never bypasses Jira's permission checks.
Next Steps
- Approvals & Signatures — configure and use the approval workflow.
- Global Dashboard — view cross-project KPIs from the global page.
- Getting Started — return to the setup guide.