Getting Started
Prerequisites
To use SealDoc you need:
- Jira Cloud — SealDoc runs on Atlassian Forge and requires a Jira Cloud instance.
- Confluence Cloud (optional) — for signing Confluence pages.
- Jira site administrator access — the user who installs SealDoc must have Jira site administrator privileges. Forge apps are installed at the site level, not per-project.
Installation
- Open the Atlassian Marketplace and search for SealDoc.
- Click Install and authorize the app for your Jira site.
- SealDoc is ready to use immediately — no additional configuration is required to get started.
Supported Issue Types
SealDoc works with all Jira issue types, including Story, Bug, Task, Epic, Sub-task, and any custom issue types your organization has created. The signing ceremony and audit trail are identical regardless of issue type.
Where to Find SealDoc
SealDoc appears in the following locations:
| Location | Purpose |
|---|---|
| Issue Sidebar Panel | View and add signatures on any Jira issue. The primary signing interface. |
| Issue Context Badge | Shows the current approval status (Draft / In Review / Approved) as a badge on the issue sidebar. |
| Confluence Page Action | Sign Confluence pages from the page actions menu. Available when the SealDoc Confluence module is authorized. |
| Confluence Signature Block | Embed a signature summary block in Confluence pages using the /SignatureBlock macro. |
| Project Page | Project-level signature overview: search issues, view signature status in bulk, batch sign up to 10 issues, review the per-project audit trail, run chain validation, and export audit data as CSV or PDF. |
| Admin Settings | Site-wide signature policies, safety classification schemes, permissions, and audit log. |
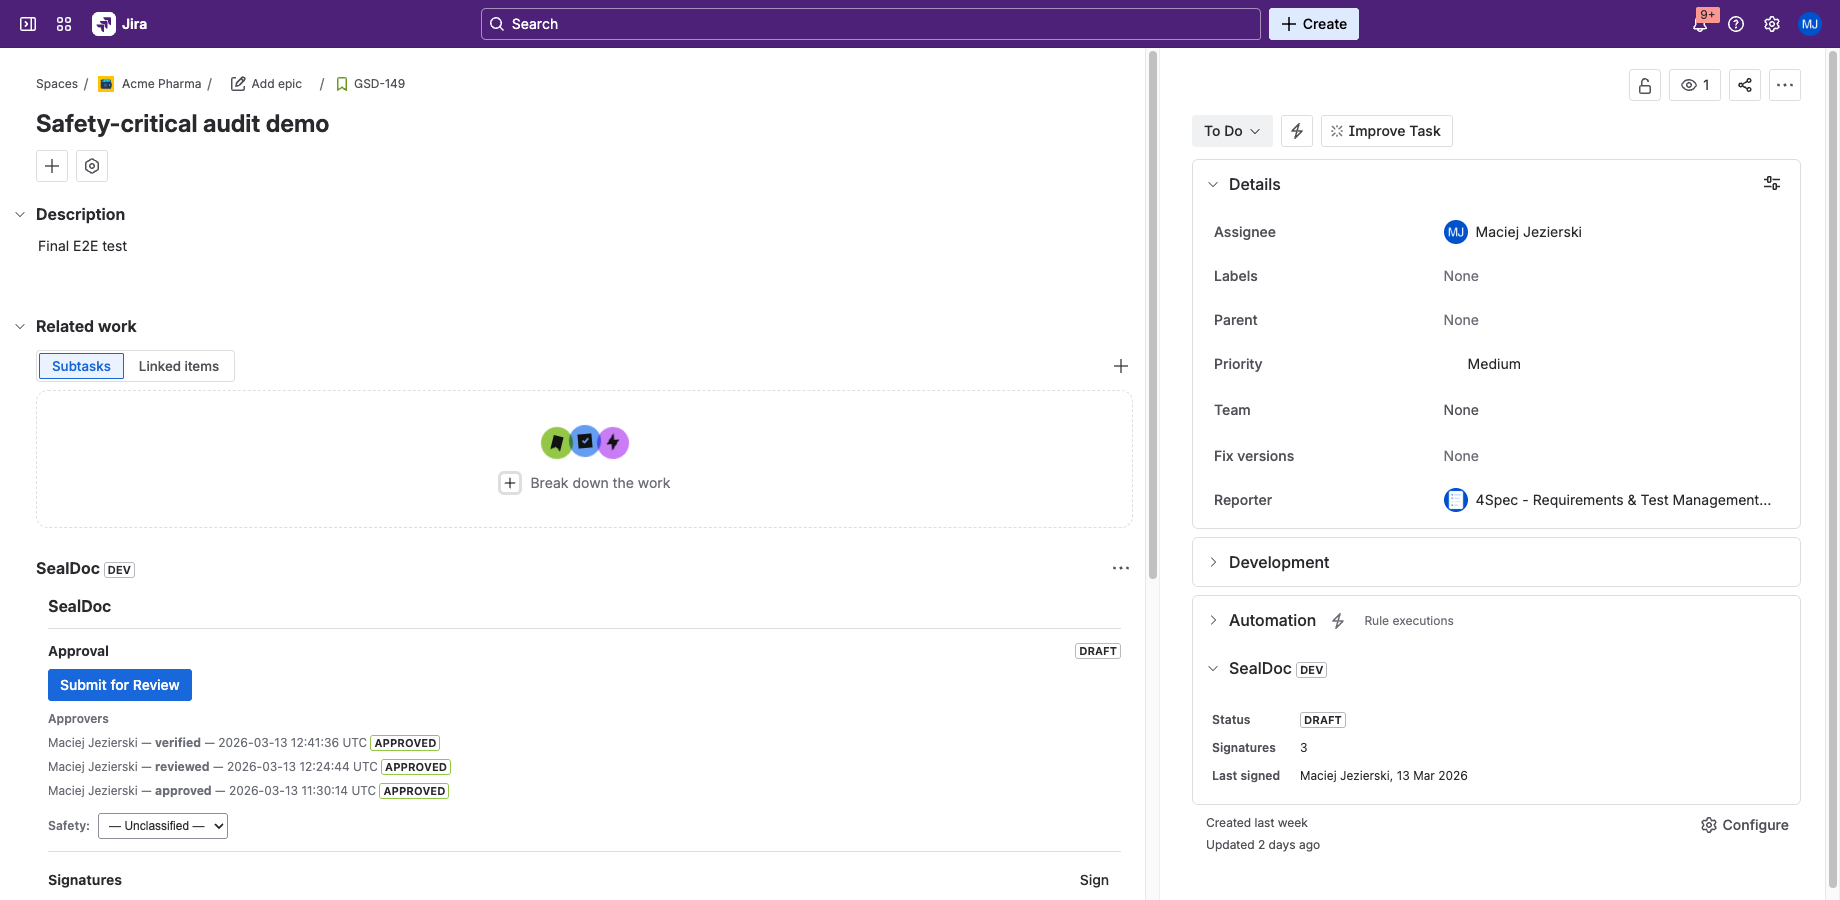

First Signing Ceremony
Follow these steps to sign your first Jira issue:
- Set up your signing PIN — Open any Jira issue and click the SealDoc panel in the sidebar. You'll be prompted to create a 4–6 digit signing PIN. This PIN is your second identification factor (required by 21 CFR Part 11).
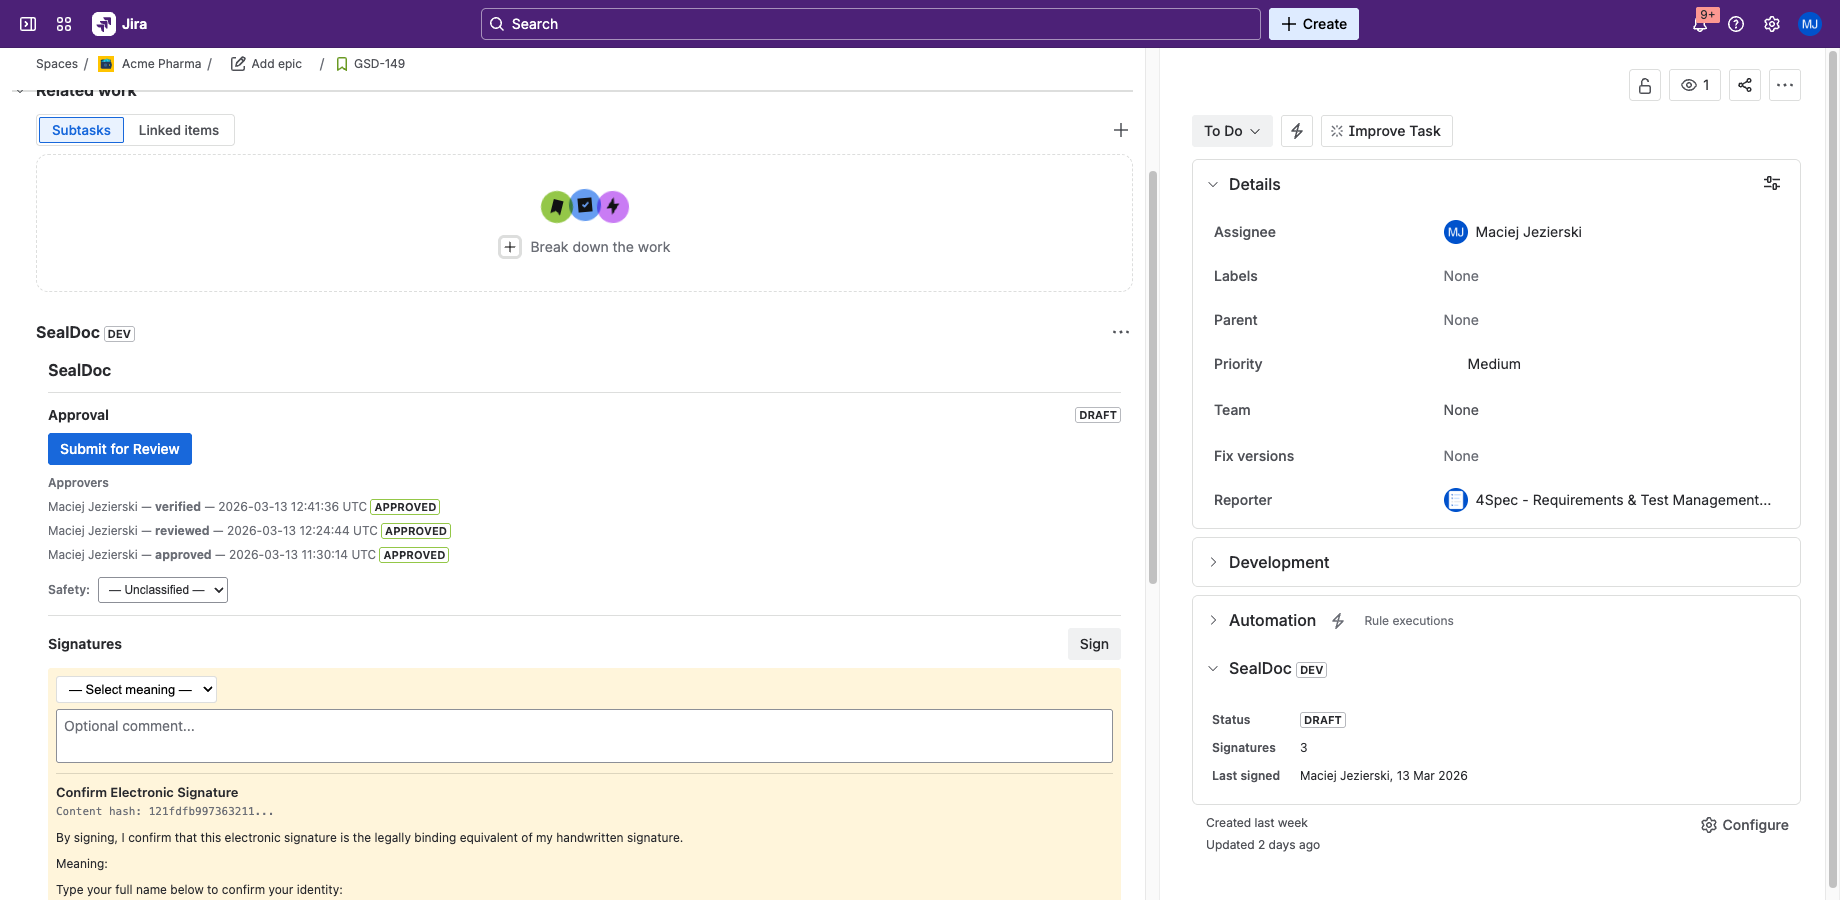
- Click "Sign" — Choose a signature meaning (e.g., Approved, Reviewed, Verified) and optionally add a comment.
- Affirm your identity — Type your full name to affirm your intent to sign.
- Enter your PIN — Enter your signing PIN to complete the two-component signing ceremony.
- Done — Your signature is recorded with a content hash snapshot and added to the tamper-evident audit trail.
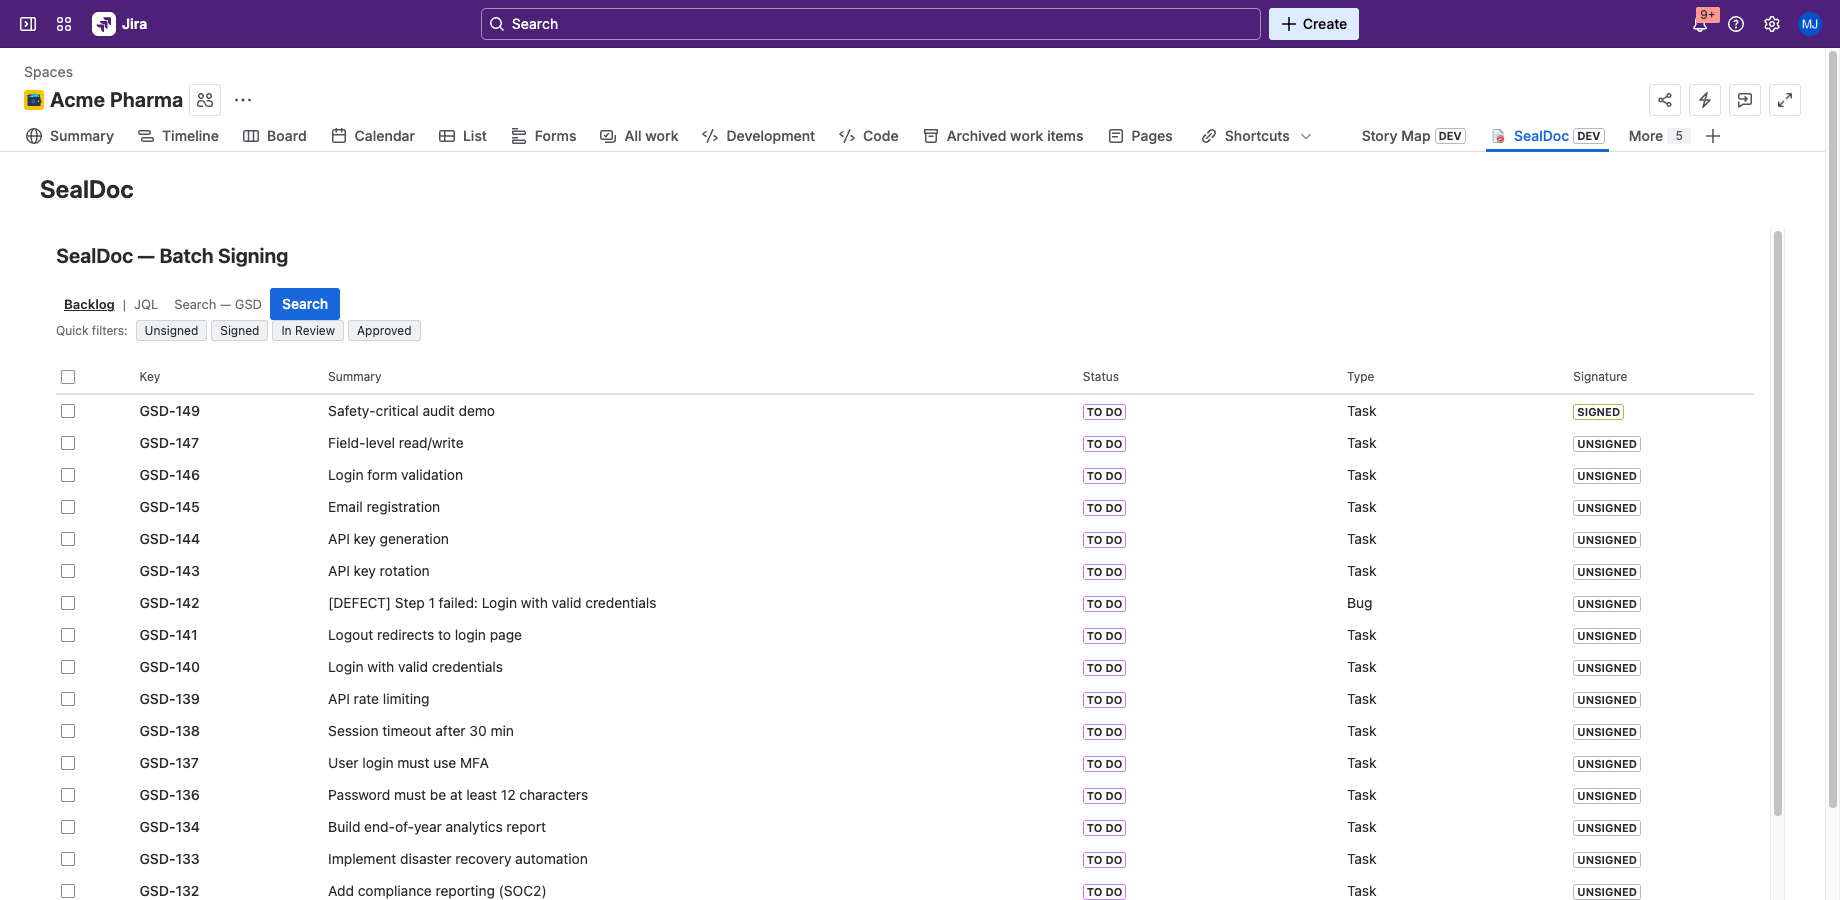
Batch Signing
Need to sign multiple issues at once? Open the SealDoc project page from the Jira project sidebar. Search by backlog or JQL, select issues with checkboxes, and sign them all in a single ceremony with the same PIN and affirmation.
Next Steps
- Electronic Signatures — learn about signature meanings, content hashing, and revocation.
- Signing PIN — understand PIN security, expiry, and lockout.
- Approval Workflow — configure the Draft → In Review → Approved workflow.
- Admin & Settings — configure signature policies, safety classification, and permissions.
For Regulated Environments
If you are using SealDoc in a regulated environment (FDA, GMP, EU Annex 11), review the following pages before deploying to production:
- Validation Support — system description, IQ/OQ/PQ guidance, vendor quality statement, risk management.
- Data Integrity — ALCOA+ mapping, tamper detection architecture.
- Training & SOPs — recommended training topics and SOP templates.
- Changelog — version history for change control tracking.
- Compliance Mapping — feature-to-regulation mapping for 21 CFR Part 11, EU Annex 11, eIDAS, and GDPR.
Need Help?
For questions or feedback, contact contact@be4.software or visit our support portal.